
A New Chapter for Apple Developers Apple’s WWDC 2025 wasn’t just about new products—it was…
How to Rename Xcode Project
In this tutorial you will learn How to Rename your app or how to rename an Xcode Project.
Let’s say you have an app named AppOne, and you want to rename it to AppTwo.
Let’s begin to learn How to Rename Xcode Project:
How to Rename Xcode Project
- Open the Xcode project with your AppOne.
- Show the project navigator, click on the AppOne project.
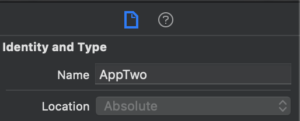
- Click on the Show the File Inspector and change the Name in the Identity and type to AppTwo. It should have the name of AppTwo Now
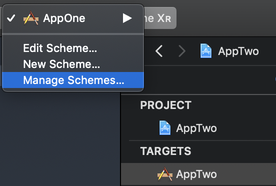
- Click on “Set the Active Scheme” and select Manage Schemes
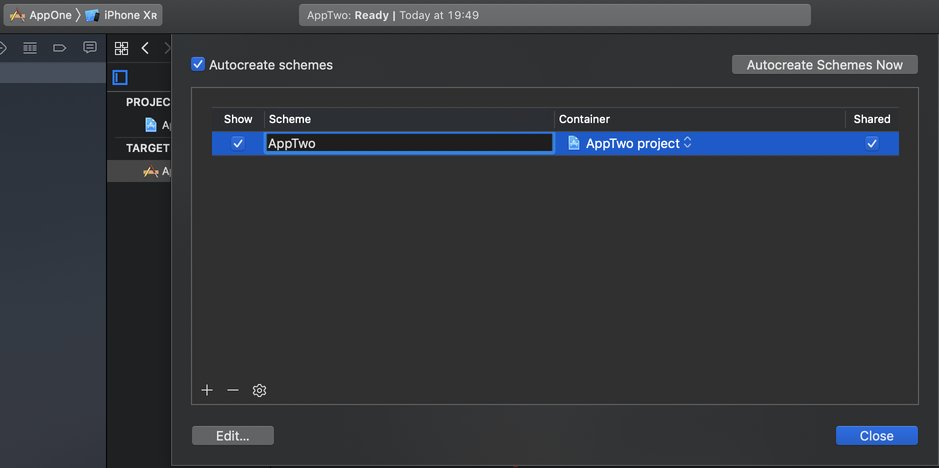
- Rename the scheme to the new name : AppTwo and press Close.
- Now if your app doesn’t contain Cocoapods, close the Xcode (If the app contains Cocopods scroll to the next section of this tutorial. Open your App folder. It has the old name currently: AppOne.

- Let’s rename the folder name to AppTwo
- Click on the AppTwo.xcodeproj to open the project again. If the alert “The folder “Assets.xcassets” doesn’t exist.” appears, click OK.
- Now in the Project Navigator click on the AppOne folder and rename it to AppTwo (You can do in in the Identity and Type changing the name field)
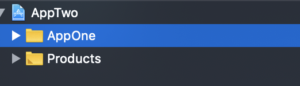
- Click on the folder item below the location and change it from the AppOne and AppTwo.
- Click on the Project Navigator, click on the Build Settings, search for plist. Rename the Info.plist file path from AppOne/Info.plist to AppTwo/Info.plist. Change the ending in the Product Bundle Identifier from AppOne to AppTwo. Search for Developmental Assets and change it too if you use SwiftUI.
- If you have tests, also rename them like you did it in the step 6.
- Your renaming job is finished. Now just clean the project and build and run the project in the simulator
How to Rename Xcode Project with Cocoapods
Now let’s assume, your Xcode project contains Cocoapods. Again we want to rename AppOne to AppTwo.
- Open the Xcode project with your AppOne.
- Show the project navigator, click on the AppOne project.
- Quit Xcode, And rename AppOne.xcworkspace to AppTwo.xcworkspace
- Make steps 3 – 13 from How To Rename Xcode project mentioned above.
- In the project navigator edit Podfile. Change it’s target from AppOne to AppTwo.
- Quit Xcode and delete AppOne.podspec file in the project folder.
- Open Terminal, navigate to the project folder and run rm -rf /Pods. After that run pod install
- Open Xcode and in the project navigator click on the Bulid Phases. Find Link Binary With Libraries and delete libPods-AppOne.a.
- Clean and run the project.
- If your project contains a Bridging header, you should do the following. In the Build settings change the header location from AppOne/AppOne-Bridging-Header.h to AppTwo/AppTwo-Bridging-Header.h
In this tutorial you’ve learned how to Rename Xcode Project and you iOS App.
Don’t forget to subscribe to AppMakers.Dev mailing list if you love this content and want to stay tuned with recent iOS Development news, courses, tutorials and resources.
Keep in mind that at the moment of writing this post we used Xcode 10.
Related Posts