
In this article, we will walk you through the process of setting up GitHub in…
How to Add Haptic Feedback to your iOS App Swift Tutorial
In this tutorial, you will learn how to add Add Haptic Feedback to your iOS App.
You will Need Mac, the latest Xcode and a real device running on iOS to complete this tutorial.
Let’s dive in.
Open your Mac and Xcode. Create a new project and name it Implementing Haptic Feedback.
@IBAction func hapticTapped(_ sender: UIButton) {}There are several options to add Haptics Feedback.
The first one is to use UIImpactFeedbackGenerator()
Add the code from the screenshot to your simulator and press run.
We are declaring an impactGenerator variable of the UIImpactFeedbackGenerator() subclass.
And we call it in hapticTapped function. You should run and tap on a button and FEEL it.
Let’s move to a second option
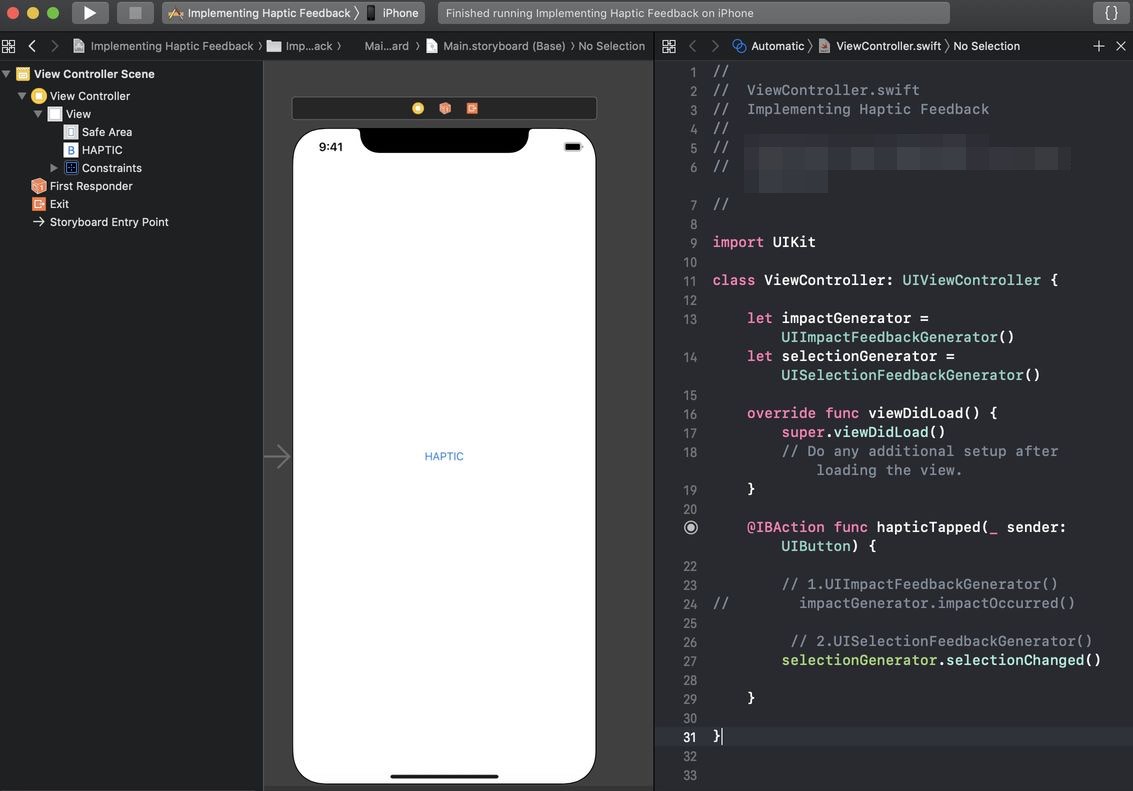
UISelectionFeedbackGenerator() subclass is used to indicate a change in selection. Declare a variable and add a call to it in hapticTapped. Feel it.
The third option is to use UINotificationFeedbackGenerator(). It is used to communicate successes, failures, and warnings.
Declare a new variable: let notificationGenerator = UINotificationFeedbackGenerator()
In hapticTapped() method try to call these functions step by step and feel the feedback.
notificationGenerator.notificationOccurred(.success)

notificationGenerator.notificationOccurred(.warning)

notificationGenerator.notificationOccurred(.error)
That’s it. Now you know how to implement haptic feedback into your iOS App. Thanks for reading this tutorial.
Don’t forget to subscribe to AppMakers.Dev mailing list if you love this content and want to stay tuned with recent iOS Development news, tutorials and resources.
Keep in mind that at the moment of writing this post we used Xcode 10 and Swift 5.
If anything will change in the future, it is OK.
Related Posts