A New Chapter for Apple Developers Apple’s WWDC 2025 wasn’t just about new products—it was…
How to upload your Xcode Project to Github – Tutorial

In this article, we will walk you through the process of setting up GitHub in Xcode and uploading your SwiftUI project to your GitHub account. The steps will include configuring GitHub in Xcode, creating a Git repository, and pushing code updates. Let’s dive in!
Step 1: Create a New Xcode Project
- Open Xcode and create a new SwiftUI project.
- Name your project. In this example, we’ll call it “Xcode To Github Demo App.”
Step 2: Add Your GitHub Account to Xcode
- In Xcode, navigate to Xcode > Settings (or Preferences, depending on your macOS version).
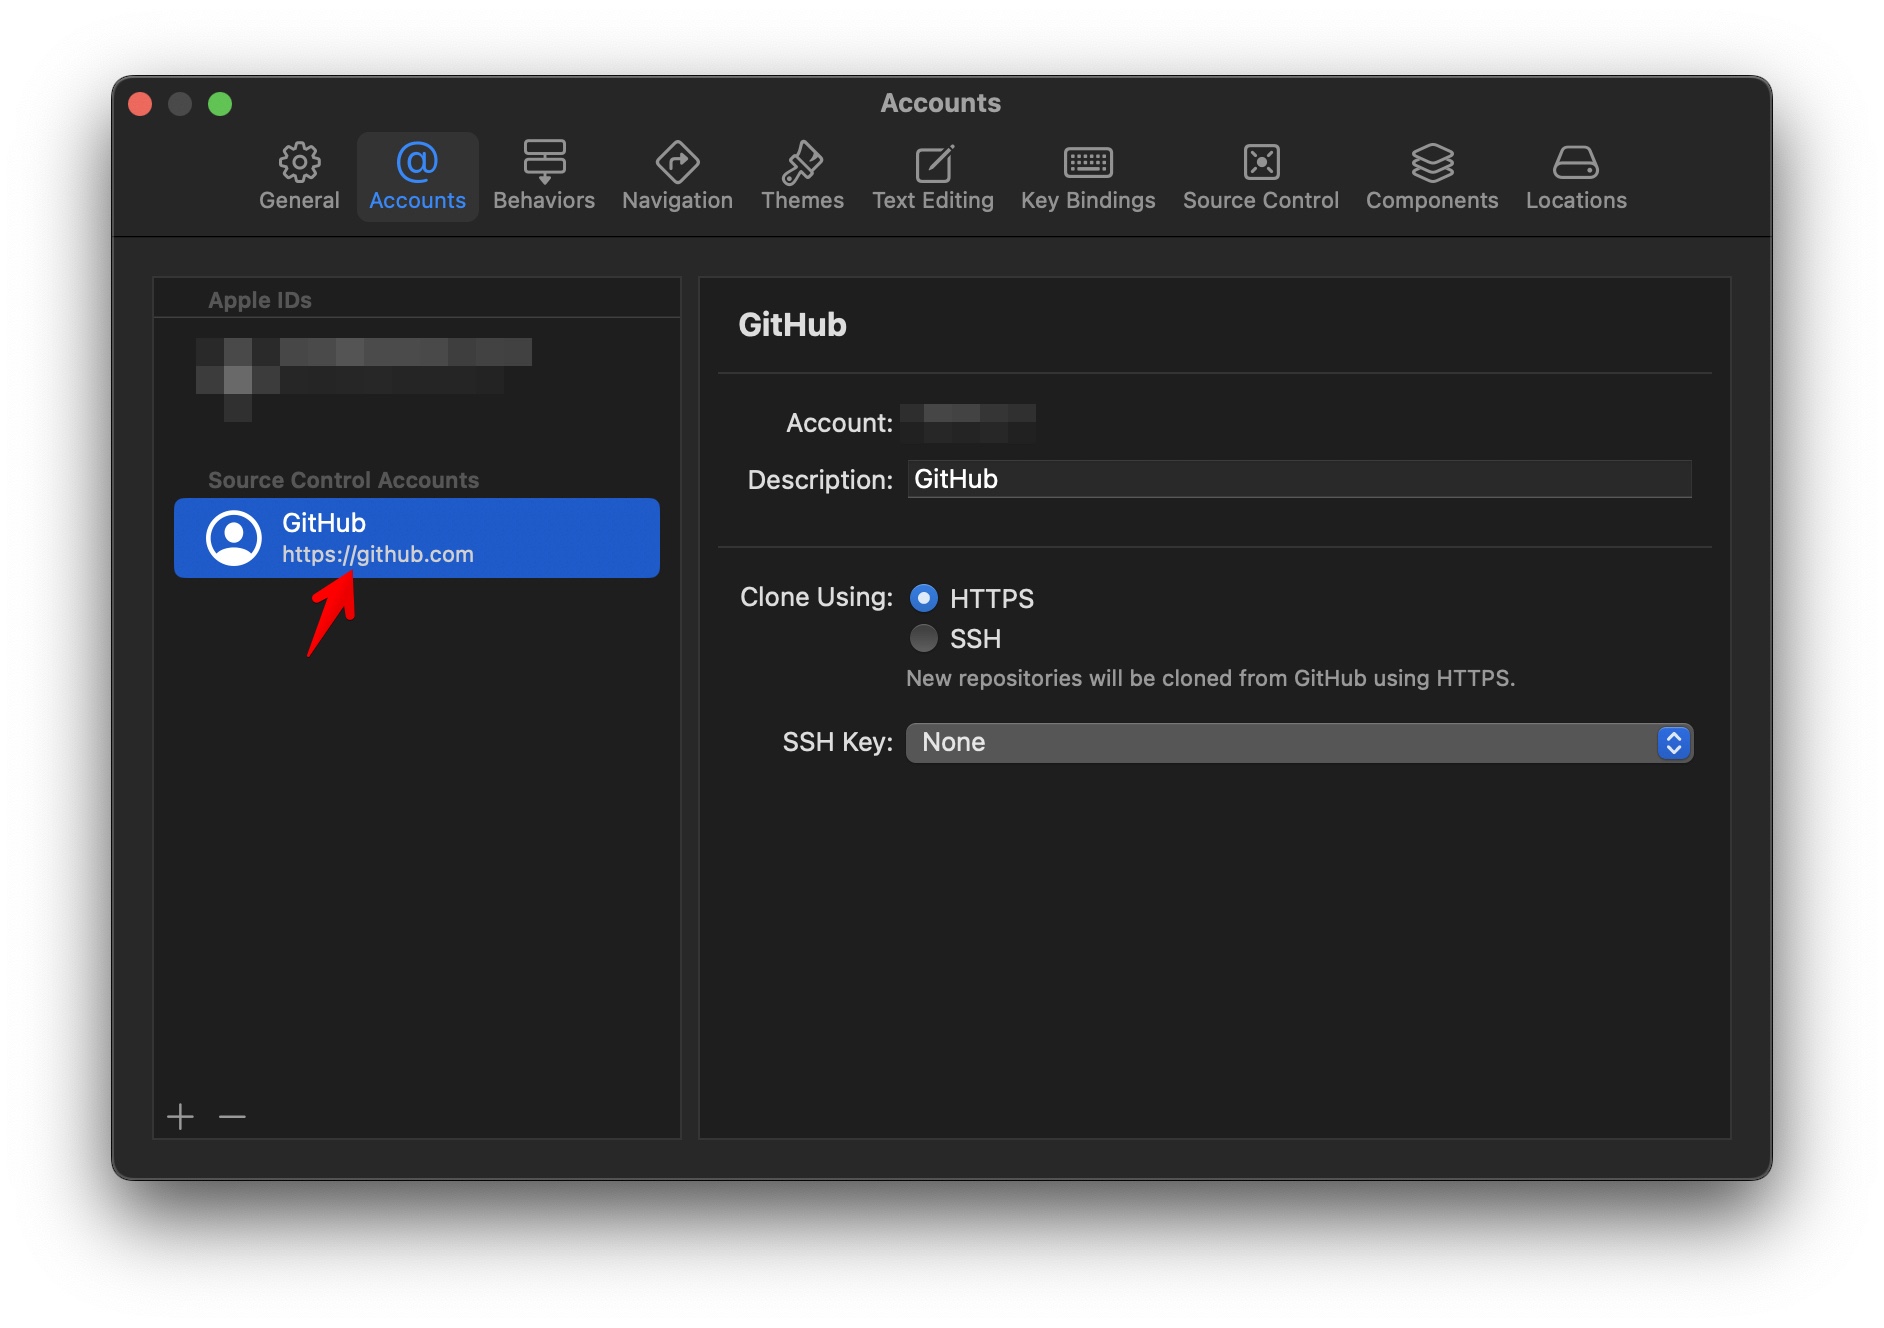
- Go to the Accounts tab.
- Click the + button to add a new account, and select GitHub.
- Enter your GitHub username.
- You’ll need a personal access token to authenticate. Let’s generate one.
Step 3: Generate a Personal Access Token on GitHub
- Log in to your GitHub account, tap on your profile icon and go to Settings.
- Scroll down and select Developer settings (on the left).
- In the left-hand menu, click Personal access tokens > Tokens (classic).
- Click Generate new token, and confirm by entering your GitHub password.
- Name your token (e.g., “Xcode”), and set an expiration date or choose No expiration.
- Check all the scopes to grant full access, then click Generate token.
- Copy the generated token.
Step 4: Link the Token with Xcode
- Go back to Xcode, paste the token in the Token field, and click Sign In.
- Now your GitHub account is linked to Xcode.
Step 5: Set Up Source Control in Xcode
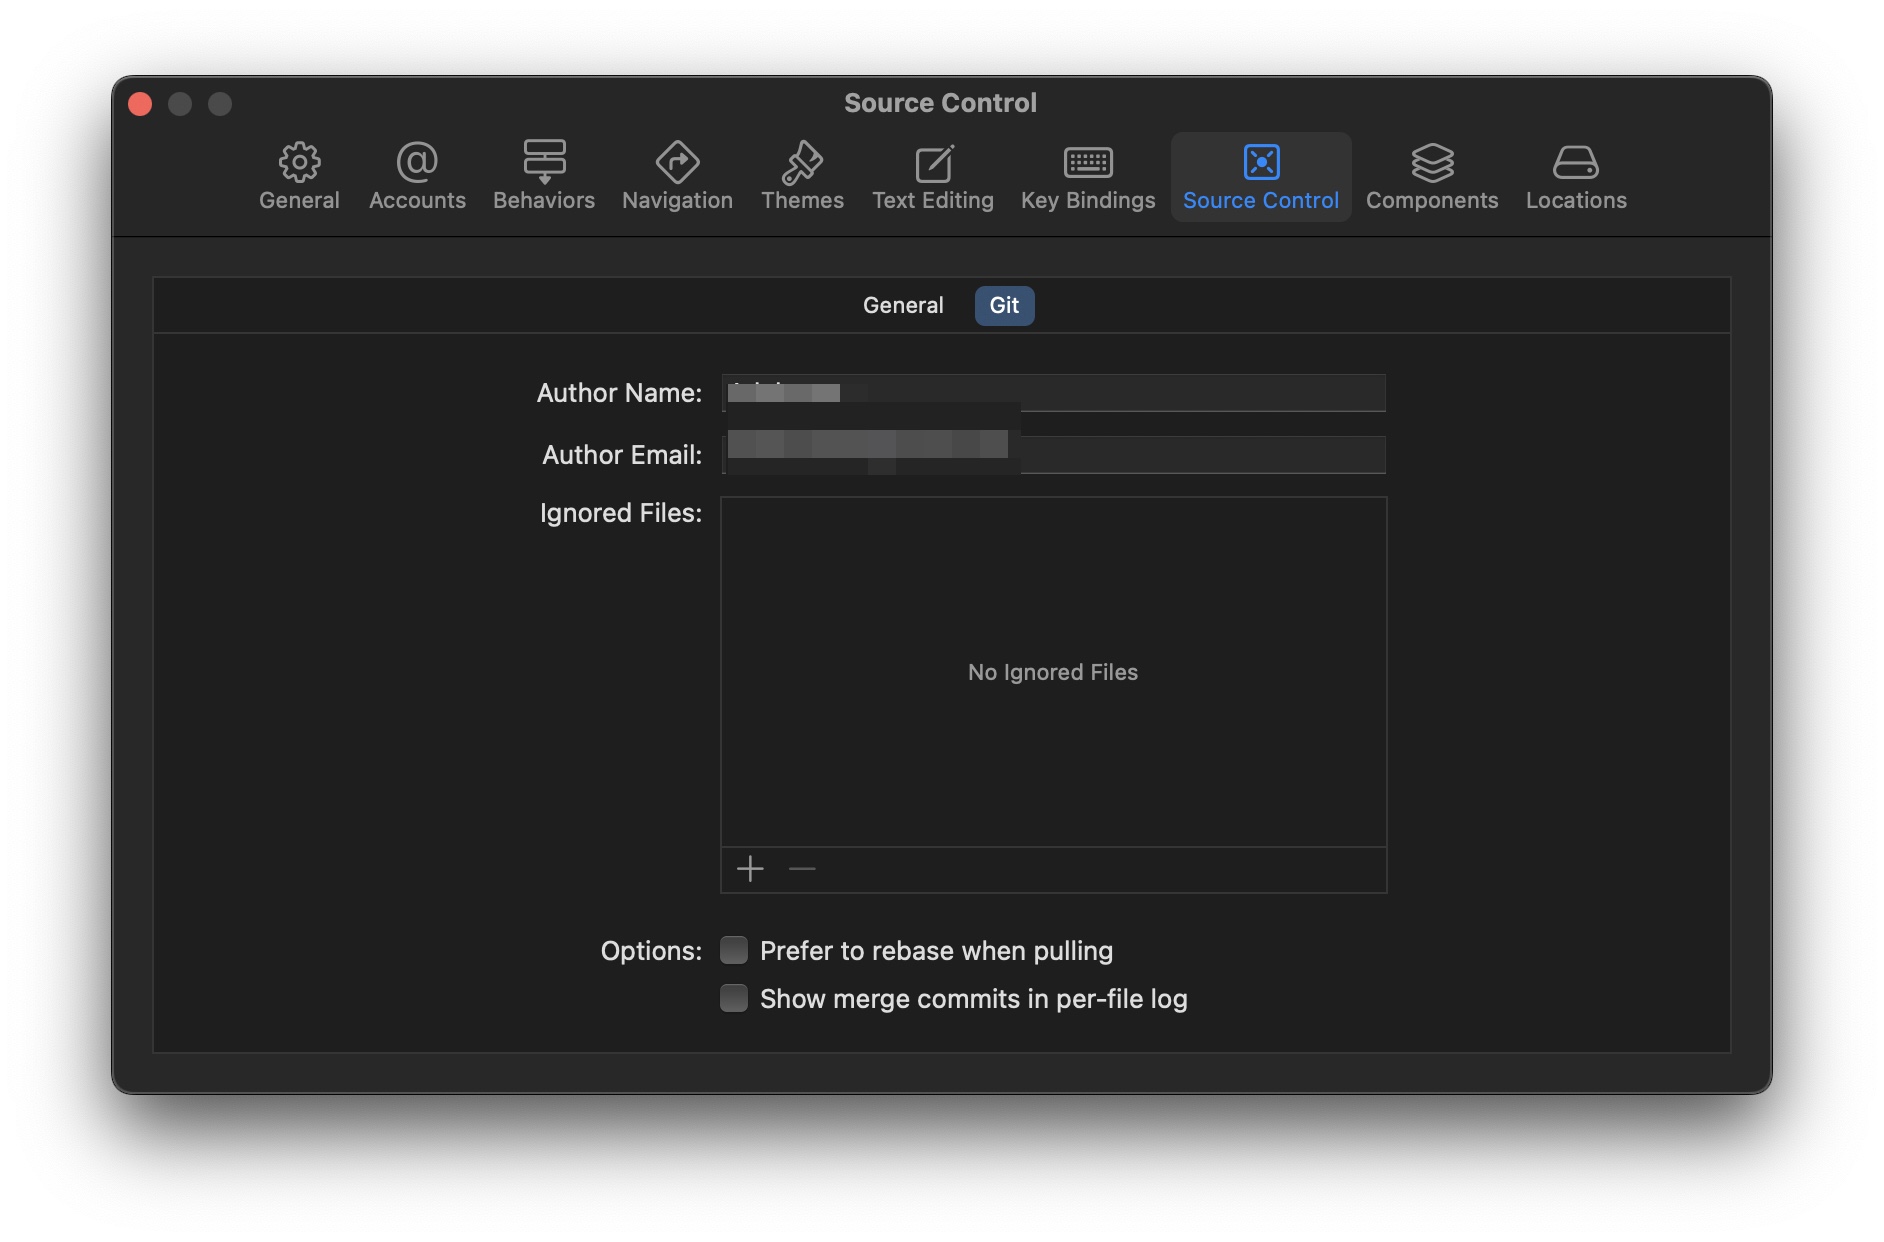
- In Xcode, go to Settings > Source Control > Git.
- Set up your Author Name and Email (use your GitHub username and the email associated with your GitHub account).
Step 6: Create a New Git Repository and Push Project to Github
- Close the Settings window.
- Tap Command+2 to open Navigator’s Source Control and select Repositories.
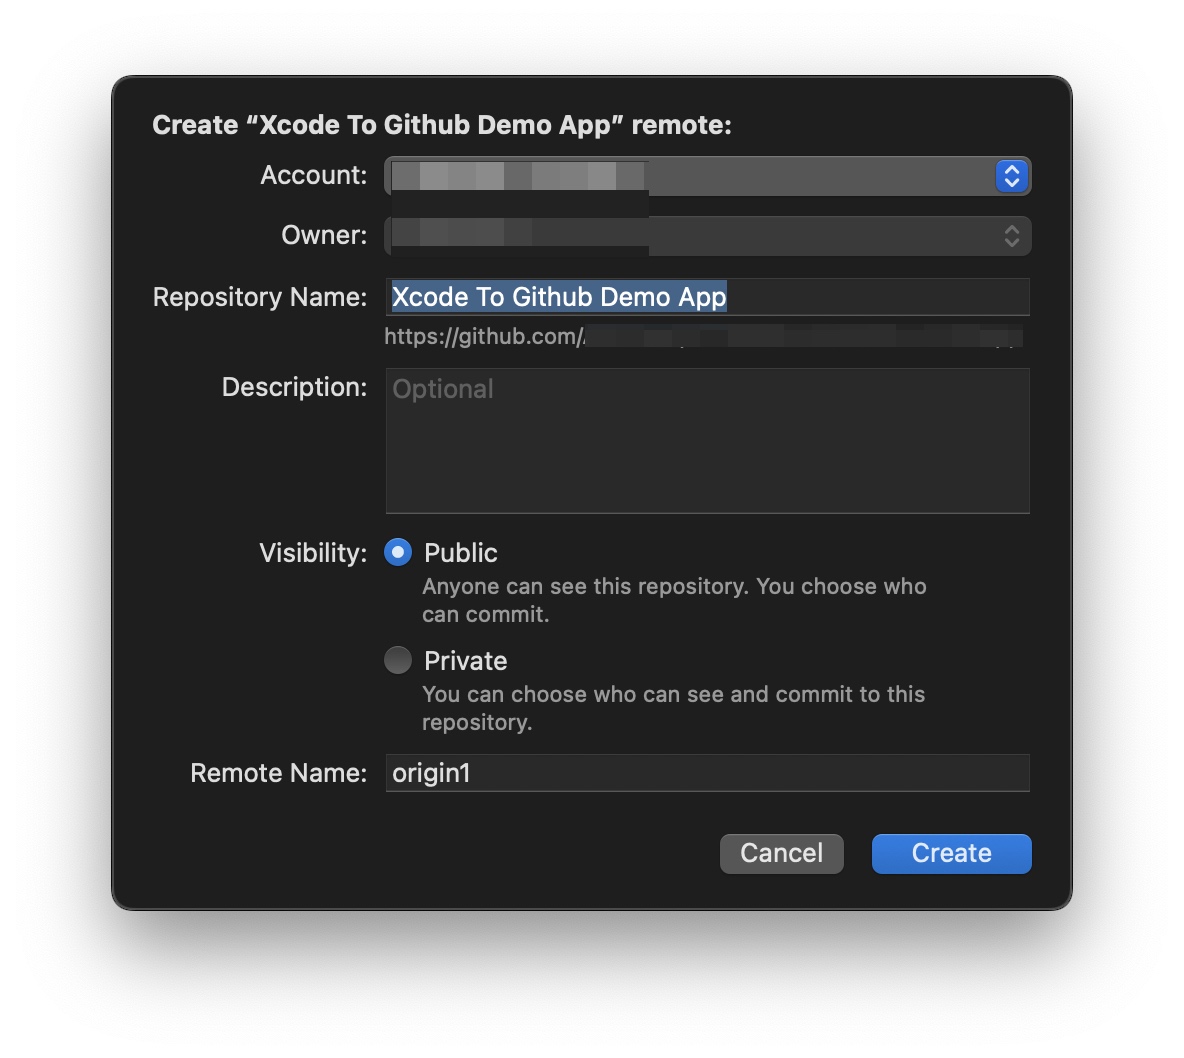
- Tap on the Xcode To Github Demo App in repository and tap “Xcode To Github Demo App” Remote
- Choose the Github Account, Set repository name if needed, Set Visibility (Public or Private), write Description if needed
- Tap Create
- Optional: If you don’t see Repository in your Navigator you can try to tap Integrate > New Git Repository to create one and after that follow the steps 1-5 of Step 6
Step 7: Check repository on Github
- Go Github > Your Repositories and check if the new repository appeared
Step 8: Make Changes and Commit Them
- Let’s make a simple change in the project:
- For example, update the text in ContentView.swift from “Hello, World!” to “Hello Github”
- Go to Source Control > Commit, and you’ll see the change highlighted.
- Add a commit message (e.g., “Changed ContentView Message to Hello Github“), and click Commit.
- If it asks to Stage, tap Stage all and commit (You should stage changes before committing)
Step 9: Push the Commit to GitHub
- After committing the changes, go to Source Control > Push.
- Select the origin (by default, it’s the main branch).
- Leave include tags unchecked, we will discuss this checkbox later
- Click Push, and your changes will be uploaded to GitHub.
Step 10: Verify the Changes on GitHub
- Go to your GitHub repository and refresh the page.
- You should see the recent commits and changes in the project files.
- You should check Activity section of your project on Github to see the latest commit
How to Tag Your commit in Xcode and Provide a Version (e.g., 1.0.0) for your Commit
Tagging helps mark specific points in your project history, such as a release version.
- Go to Source Control > Branches.
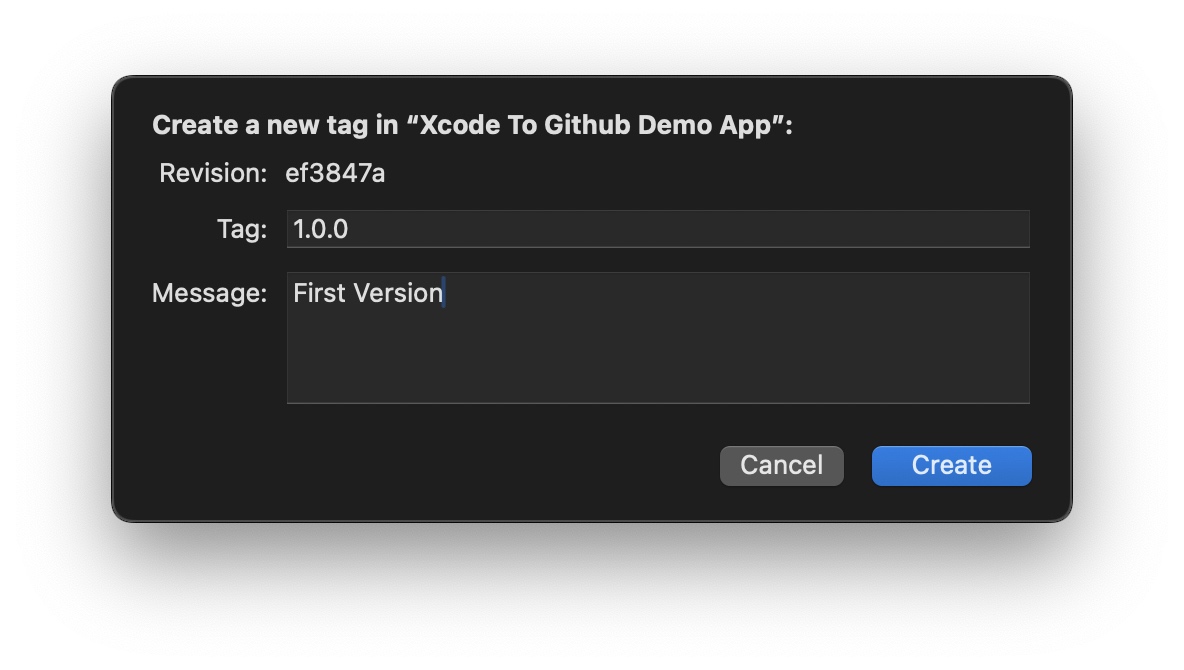
- Right click on main and select Tag “main”
- Add version number, for example1.0.0 and a message
- Make some changes into your project
- Go to Integrate > Push and check include tags
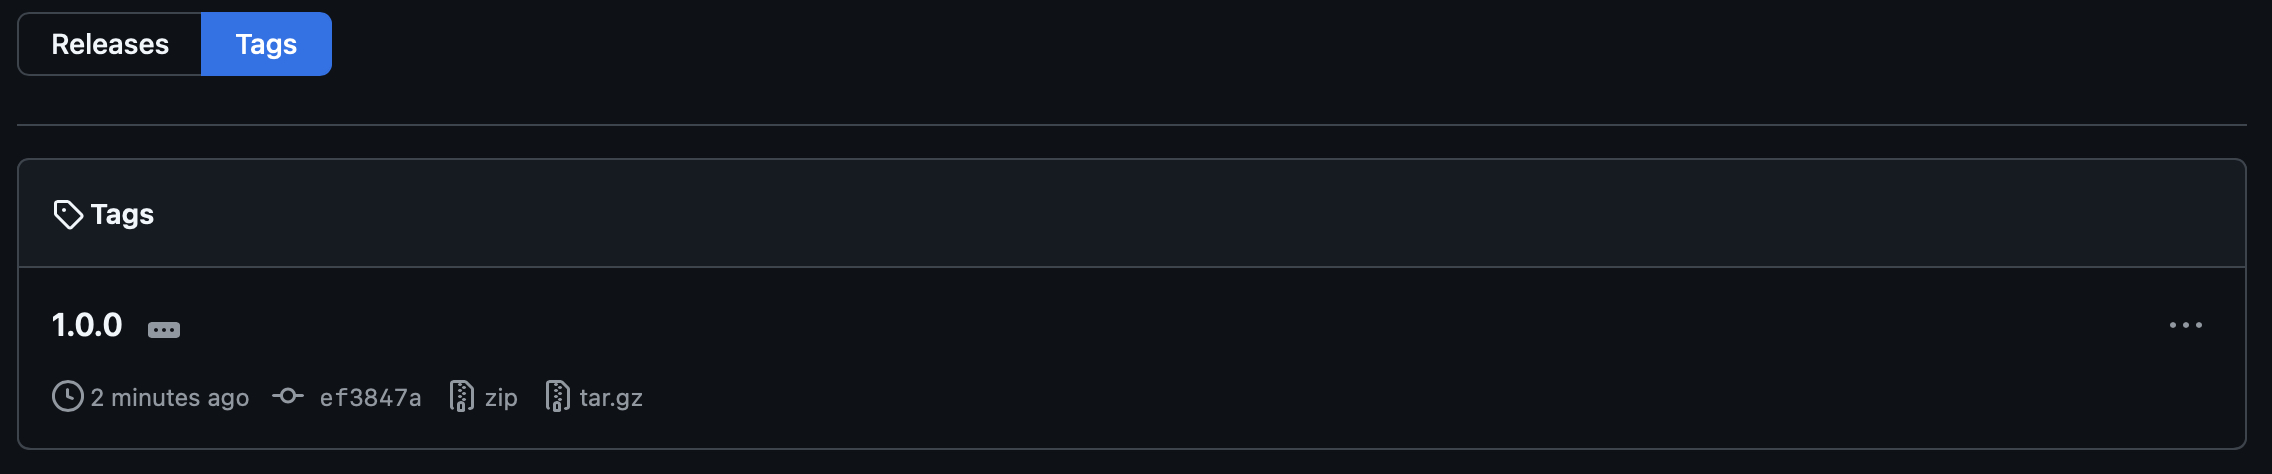
- Go to Github > Releases > check tags
How to Fetch changes from Remote
- Go to Github into your Project repository and tap Create Readme file there
- Fill in Readme file with some text, for example:
# README Demo App to show how to Connect Xcode Project to Github ## Overview Learn Daily ### Section header Some Section Text here - Now go to Xcode and tap Pull to get changes from Github.
Understanding Staging, Amending, and Committing Changes
Xcode uses Git’s staging area to manage changes, allowing you to control exactly what goes into each commit. Here’s how to work with staging and amending:
What is Staging?
Staging means preparing specific changes to be included in your next commit. In Xcode:
- Staged Changes: These are the changes you have selected to commit. They will be included in the next commit you make.
- Unstaged Changes: These changes are not yet prepared for committing. You can choose to stage them by checking the boxes next to the file names in the commit window.
How to Stage Changes in Xcode:
- View the Changes: Go to Source Control > Commit to see the list of changed files.
- Stage the Files: Check the box next to each file you want to include in your commit.
- Unstage if Necessary: Uncheck any files you don’t want to commit yet.
Amending a Commit
Sometimes you need to make small changes to the last commit without creating a new commit. Here’s how to amend in Xcode:
- Make the Desired Changes: Modify the files you want to update.
- Go to the Commit Window: Source Control > Commit.
- Select “Amend Previous Commit”:
- At the bottom of the commit window, you’ll see an option labeled “Amend Previous Commit.”
- Check this box to modify the last commit instead of creating a new one.
- Update the commit message if necessary, and click Commit.
Example Use Cases:
- Staging: Useful for breaking larger changes into smaller, logical commits.
- Amending: Helps fix mistakes in the last commit, such as forgetting a file or making a typo in the commit message.
Related Posts